Saving a File to a Record
Privileged Access Management’s Records can be used to securely store (encrypted) and share any file types including certificates, keys, archives and documents in its AES-256 bit protected database.
This is extremely useful when needing to share file objects between trusted users while maintaining security and capturing audit events like who downloaded the file and when.
To begin, you may use an existing Record Type that contains a secure File field or you may create your own custom Record Type.
For the purpose of this exercise, we are going to create our own custom type.
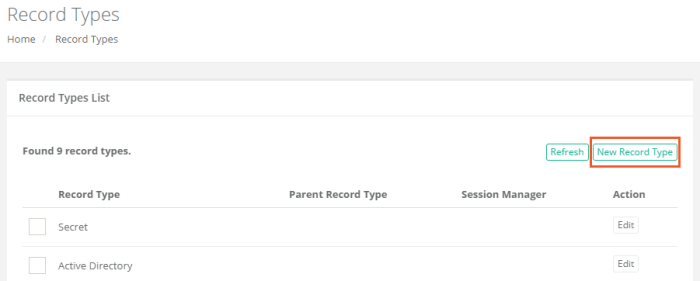
- Login to the System as a System Administrator and then navigate to Administration > Record Types.
- Click the New Record Type button to start creating your own custom type.
-
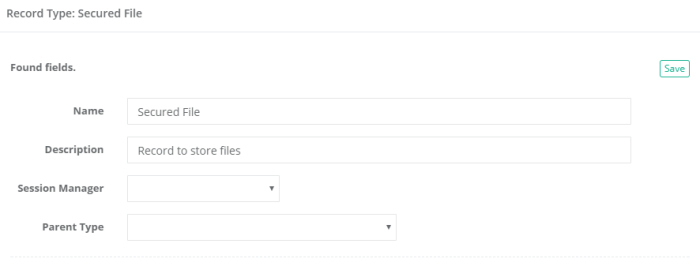
Enter a unique Name and (optionally) a Description. Leave the Session Manager option empty because this record will be used to store files, not establish remote sessions. Also leave the Parent Type option empty as well as we are not going to inherit any fields from an existing type. Click the Save button.
-
Your new record type has been created, so it is now time to add our custom fields. Click the Add Field button.
-
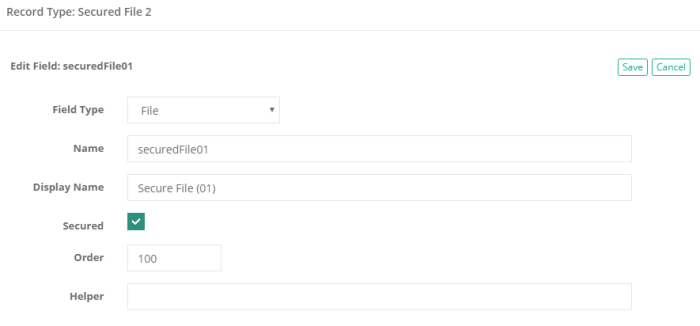
Enter a unique Name (name is used internally to store the file) and a Display Name. The display name will be shown in the Record so it should be easily understandable by others. Check the Secured box, enter 100 for sorting Order and finally leave Helper empty. Click Save to continue.
-
If you would like to add additional custom fields, simply repeat the process above based on your requirements. When satisfied with your new custom Record Types and its fields, continue on to the next step.
-
Navigate to Records > All Records.
-
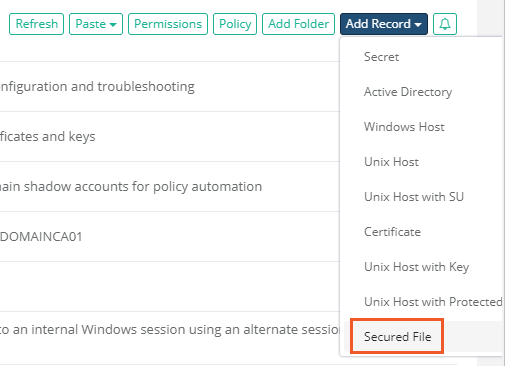
Click the Add Record button to open the drop down menu and then select your new Record Type.
-
Enter a Name for this new Record and optionally a Description. Below these two default fields, will be the custom fields we created earlier. In our example, there are two secured File fields.
-
To work with File fields, simply click the Choose File button and open a file selector dialog. Locate and add your file to this field. Repeat this process as often as necessary to add or replace a file associated to the field.
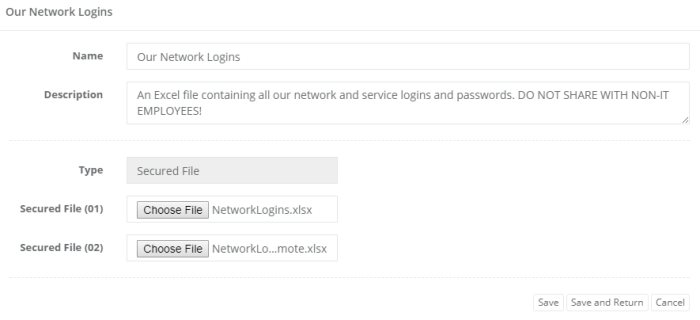
-
When complete, click Save and Return to save the record and return back to the All Records view.
-
You have now created a Record that stores your encrypted file in the PAM system. At this point you can View the record to observe how it will appear to other users, you may Edit the record to change the file(s) or modify its Permissions to share it with others.
-
To download the file from PAM’s secured Record, click the Unlock button to the right of the field and then click on the file’s name. A confirmation box will appear, so click OK to begin the download.

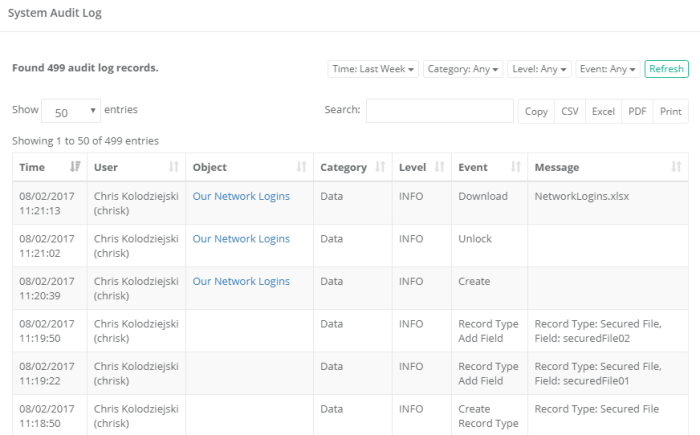
If you followed through with this exercise, navigate over to the system’s Audit Log now (Administration > Audit).
This is the area of the system where all events are captured and available for review. In this log you should see the results of our previous actions of creating the Record Type, Creating the Record, Unlocking the file and finally Downloading the file from the system.
