Setup SSH Tunnel Access
A common scenario we hear from our users is that they want to provide access to an internal resource (for example, a production database) without having to open access to it externally.
In addition, allowing their Admins and Developers to continue to use their native client tools is usually a must have requirement.
So how can you satisfy such a requirement will maintaining security?
The answer is simple; use PAM’s privileged access management while employing SSH tunnels. Using a secure, password-less SSH session to the jump server, the user’s traffic from their client is then tunneled to the desired endpoint.
Other common scenarios where SSH Tunnels are used:
- Ports cannot or should not be opened
- The service or system should only be accessible internally
- Firewall configurations
- Security architecture requires it
To enable the capturing of SQL statements to the PAM Session Event report, please read our Capturing SQL Traffic article.
In the following example, we will demonstrate how PAM is configured to use a Unix jump server in order to provide a SSH tunnel from an external SQL Developer client to an internal Oracle database.
To make use of SSH tunneling, you first must enable the SSH Proxy feature in PAM. If you have not this feature yet, please first read our SSH Proxy article and then return here when complete.
- Create a Unix record in PAM that will be used as the jump server for the ssh tunnel.
- Open your preferred SSH client (our example is using the Windows 10 Command Prompt) and create your tunnel using the following syntax:
- bwilliams – our PAM user
- 41603 – our PAM record ID for our Unix jump server. You can also use the PAM record Name, assuming it is unique.
- xtam.company.com – our PAM host URL
- 2022 – our PAM SSH Proxy port number
- 1521 – our local listening port (1521 is the default for Oracle)
- 10.0.0.145 – our Oracle database host IP
- 1521 – our remote listening port
- -N – (optional) to create the tunnel as a user with the “nologin” shell
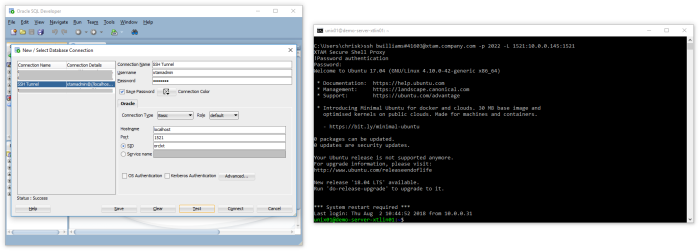
- You should now see the display message PAM Secure Proxy Shell indicating that the traffic is being routed through PAM. At the password prompt, enter the PAM user’s password.
- Once authenticated, the SSH tunnel is created. We can now connect to our internal Oracle database using localhost or 127.0.0.1 as the Hostname and port 1521. The traffic will be forwarded to the destination server behind our firewall.
-
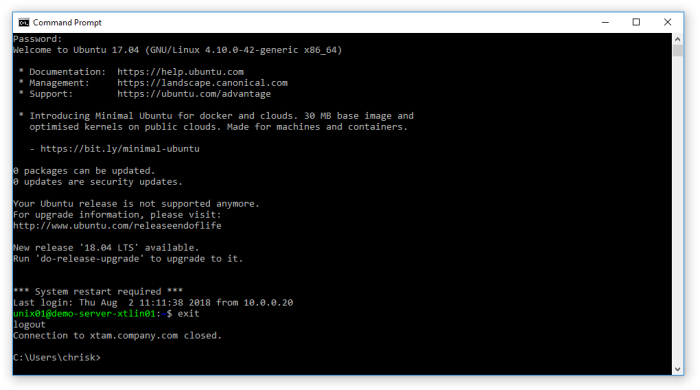
When finished, you can close the tunnel.
ssh <your PAM userName>#<PAM record name or ID of the jump server>@<PAM host url>-p <PAM SSH Proxy port number> -L <local listening port>:<remote host>:<remote listening port>
For example:

ssh bwilliams#41603@xtam.company.com -p 2022 -L 1521:10.0.0.145:1521
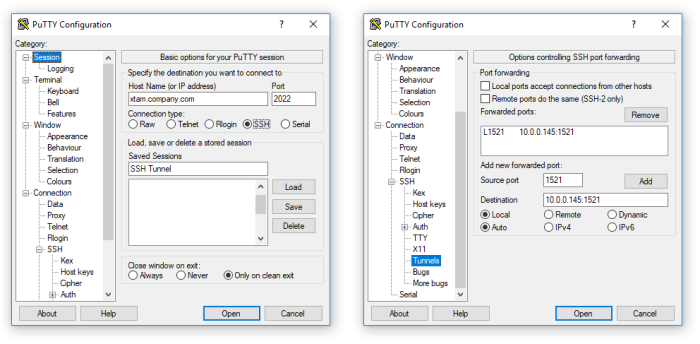
On other operating systems, you may use other SSH products. For example, on Unix you can simply use the ssh command or on Windows you could use PuTTY.
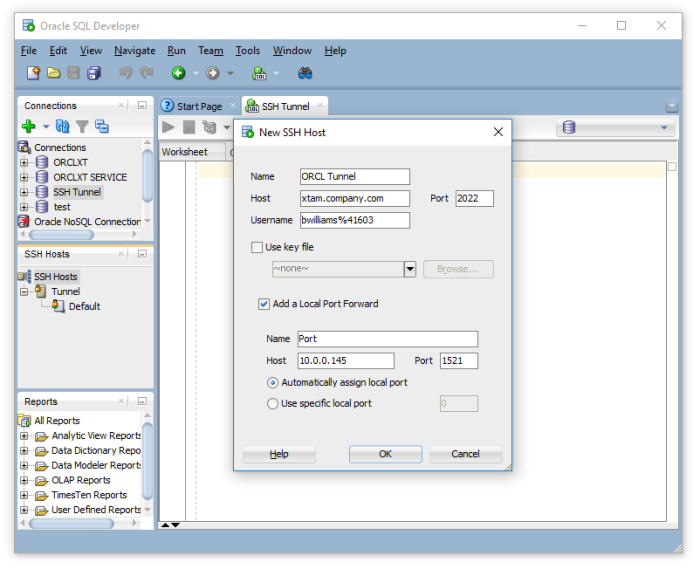
Also, many applications like SQL Developer or MySQL Studio have their own SSH Tunnel configuration options which can be used instead of a separate SSH client.


Application SSH Tunnel Configuration Examples
PuTTY

Oracle SQL Developer
