Getting Started with Workflows
This guide is designed for PAM System Administrators to learn about Workflows and will meet the following goals.
To complete the guide be sure that you have access to a System Administrator account (used for Design and Approval) and a non-Admin user account (used for Requesting).
2. Request an action (initiate the workflow)
3. Review the workflow request
5. Gain access to the requested action
Stage 1: Design an Approval Workflow
- Login to PAM as a System Administrator and navigate to Administrator > Workflows.
- In the Templates tab, click the Add button. The workflow template configures the steps required to progress the workflow through the approval process.
- Enter My First Workflow into the Name field.
- Select the Type Interactive Approval.
- Next to Step 1, click the Add button.
- When the Add Approver dialog appears, enter your current System Administrator account into the Principal field and click Add. This account will be used to Approve the request workflow.
- For the Rank value, leave the default 1 and click Select. Rank determines the total number of approvals in order to advance the workflow steps. For this walk-through, we will only designate one approver so their sole approval will advance the workflow to the Approved state.
-
Our template is now complete. We have created a simple one step workflow whose sole approver is your System Administrator account. Click Save to continue and then return back to the Workflows section using the navigation breadcrumbs.
-
Back in the Templates section, you will now see our workflow with the status Draft. Templates in the Draft state cannot be used in an active Workflow, so we must Publish it to continue. Open the Actions menu for our workflow and select the option Publish.

-
Confirm the Publish operation by clicking OK in the confirmation dialog. The Templates list will refresh and your workflow will now be in the state Published.
-
Switch to the Bindings tab and click the Add button. The workflow binding will associate our template to an action that will require approval from a designated user(s).
-
In the Template dropdown menu, select My First Workflow or the name you entered in step 3 above.
-
For the Users, click the Add button. In the Principal field, enter your non-Admin user account, click the Add button and then Select. You have just assigned this template to this user which means they will require approval.
-
For Actions, check the box next to Connect Control. This will assign the approval request to the Connect option in a record.
-
For Time Selectors, check all available options. This will ensure that for this walk-through, the workflow will be enabled regardless of your current system time.
-
For Order, leave the default value. Order defines workflow precedence if multiple templates are assigned to the same user. A lower order will take precedence over a higher order if both are applied to the same user with identical time selectors.
-
Click the Save button to complete the binding.

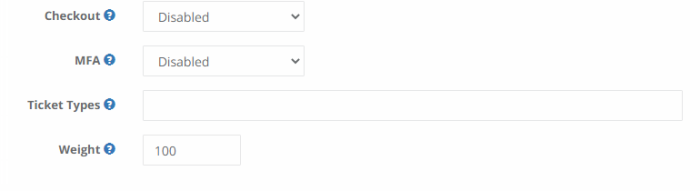
Use ? hints for your clarification of each parameter.
- Your workflow design is now complete.

Stage 2: Request an Action that requires Approval
- Login to PAM with your non-Admin account. Locate any record that you have Connect permissions to and select the Request Connect option. Note that if the button says Connect rather than Request Connect then ensure you are logged in as the PAM user identified in our workflow binding.
- Rather than launching the remote session, you will be presented with a Request Access dialog. In the Reason field, enter a brief reason for why you are requesting access to this Action. This reason will be sent to the Approver(s) for their consideration.
Note the Access Request form facilitates the adoption of request-based access to sensitive assets and allows users to submit access requests quickly and with fewer GUI interactions:
- users can select request Reason from the list of top 10 previously provided entries;
- the request Reason field auto-prompts a user to select one of the tops used reasons while the user types the new request reason;
- system administrators can change the default requested time using the system parameter Default Requested Time.
- Next, select the checkbox option to choose between a time period as defined in Minutes or for one-time access for a future date and time range.
If you select minutes, enter any value greater than 0. The minutes will indicate the amount of time this Action is available to the user beginning from the time that the approval workflow is completed as Approved.
If you select the range, enter or select using the Calendar button, a Requested From value and a Request To value in the future. This will indicate the date range where this Action will be available to the user after the approval workflow is completed as Approved.
-
Click the Request button to submit the request.

-
After the record refreshes, the Request Connect button will now change to Connect Requested indicating that it was submitted and the approval workflow has been initiated.
-
This user may click the Connect Requested button at any time during the approval process to see its current status or to Terminate or Cancel this active request.


Stage 3: Review the Workflow Request
- Log out of PAM non-Admin account and back in as your PAM Admin account. Navigate to the Reports section and select the Requests report.
- Your non-Admin user request will be listed. Included will be the Request Time, Workflow Template Name, Action, Request Reason and Status which is currently Active. You may click Details to see all the information related to this Action request.
-
You may also notice that your PAM Administrator account, which is the Approver in this walkthrough, has received an in-app notification and an email notification (if email was configured) alerting you to a request awaiting your approval.

Stage 4: Approve the Request
- Still logged in as PAM Administrator account (Approver), navigate to Management > My Workflows.
- Select the tab Requests for Approval.
- The submitted request from Stage 2 should be listed. Under its Actions menu, select the option Approve.
We will Approve this request in this walk-through, but please do later test this same process using the Reject option. Any single Reject in an Approval Workflow will immediately deny the requester’s request.

-
Once approved, click the OK button on the confirmation dialog box.
-
The request has been approved, you may now return to the Workflow Instances view (Administration > Workflows > Instances) to check the status. Since this was a single step approval with a sole Approver, the workflow is now complete and its status is listed as Approved.

Stage 5: Gain Access to the Approved Action
- Now that the request has been approved, let’s log out of your PAM System Administration (Approver) account and log back in with our non-Admin (Requester) account.
- Navigate back to the Record where the request was made. The Connect button will now be in the one of the following states:
If the request was made using the minutes option, then the Connect button will now have the Connect options available and this user will be able to start a new remote session for the amount of time requested.

If the request was made using the date range option and the current time is within this range, then the Connect button will now have the Connect options available and this user will be able to start a new remote session during this time period.
If the request was made using the date range option and the current time is not within this range, then the Connect button will continue to display the Request Connect option. When the Requested From (start time) time arrives, the record’s Connect button will become active for this time period. Otherwise, this user is able to make an additional request for this action again.

-
At anytime, this user may navigate to Management > My Workflows and use the My Requests tab to view all their past, present and future requests. This is a good location to remind yourself of when your Action will become available for future date range requests.

This completes the Approval Workflow walkthrough.
For additional workflow topics and how-to guides, return to the Approval Workflow main page and use the topics listed at the bottom to navigate the available articles.