Integration with OneLogin authentication
System Configuration for SAML: OneLogin IdP Integration
PAM supports integration with OneLogin Identity Provider using SAML protocol to defer user authentication to OneLogin.
The following guide describes how to configure your OneLogin integration.
Requirements
Before you begin your integration, be sure you meet the following pre-requisities:
- A working PAM deployment with the Federated Sign-In experience.
- Access to your existing PAM host server. You will need to update a configuration file, certificates and restart services.
- Access to your OneLogin portal to configure your AuthPoint authentication services.
- If Users are created and managed in OneLogin, then a matching user must also be created as PAM Local User.
- If Users are synced from Active Directory to OneLogin, then you must also integrate PAM with the same Active Directory.
Step 1: Begin the OneLogin Configuration
-
Login to your OneLogin account with admin account (https://someorg.onelogin.com/portal/)
-
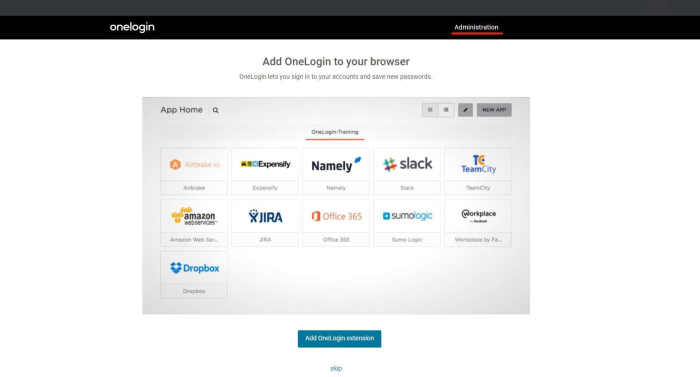
Navigate to Administration.
-
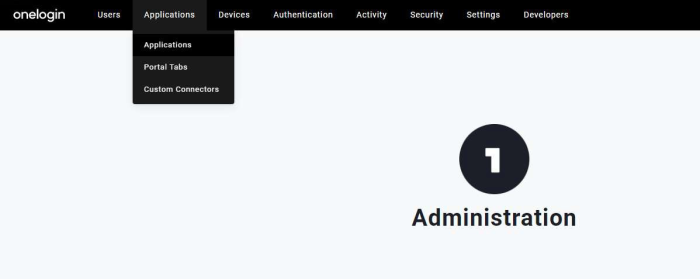
Go to Applications > Applications.
-
Click Add App button.

-
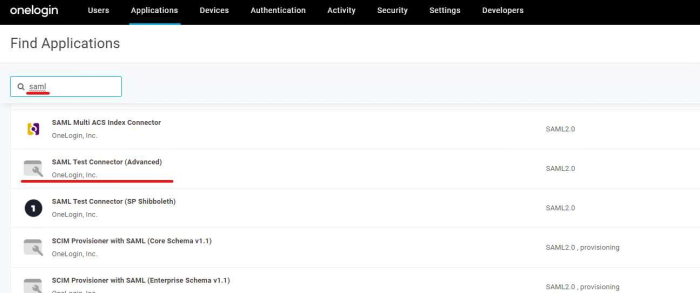
Navigate to Find Applications search for saml and choose SAML Test Connector (Advanced).
-
Enter meaningful name in Display Name field, for example, SAML PAM and click Save.

-
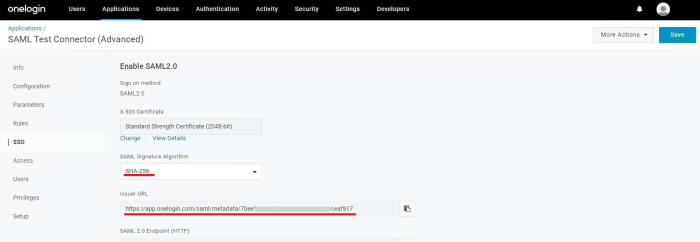
Go to SSO page and select SHA-256 for SAML Signature Algorithm. Copy Issuer URL for using it in next step. Click Save.
Step 2: Perform the PAM Configuration
-
Login to your PAM host server.
On PAM server go to $PAM_HOME/web/conf folder. Open the file $PAM_HOME/web/conf/catalina.properties in a text editor and add the following new section. Confirm that the values for each parameter is accurate to your PAMdeployment. Add new section with SAML provide configuration to catalina.properties with prepopulated data:
Copy# OneLogin SSO SAML
cas.authn.pac4j.saml[0].clientName=OneLoginSSO
cas.authn.pac4j.saml[0].keystorePassword={password}
cas.authn.pac4j.saml[0].privateKeyPassword={password}
cas.authn.pac4j.saml[0].serviceProviderEntityId={managed_path}
cas.authn.pac4j.saml[0].serviceProviderMetadataPath={PAM_HOME/content/keys/oneloginsso.xml}
cas.authn.pac4j.saml[0].keystorePath={PAM_HOME/content/keys/samlKeystoreOneLoginSSO.jks}
cas.authn.pac4j.saml[0].identityProviderMetadataPath={Metadata URL from step 1.7}
cas.authn.pac4j.saml[0].maximumAuthenticationLifetime=2073600In the lines above, the following {placeholders} need to be updated using your own values explained here.
Save and close the file when you are finished.
-
cas.authn.pac4j.saml[0].clientName={OneLoginSSO} - name SSO provider, it must match with item.
-
cas.authn.pac4j.saml[0].keystorePassword={password} - Create an alphanumeric password. Any value you want to enter.
-
cas.authn.pac4j.saml[0].privateKeyPassword={password} - Create an alphanumeric password. Any value you want to enter.
-
cas.authn.pac4j.saml[0].serviceProviderEntityId={managed_path} - audience URI, it must match with item.
-
cas.authn.pac4j.saml[0].serviceProviderMetadataPath=$PAM_HOME/content/keys/oneloginsso.xml} The full path and file name of the oneloginsso.xml file. For example, C:/$PAM_HOME/content/keys/oneloginsso.xml (use forward slashes not backslashes)
-
cas.authn.pac4j.saml[0].keystorePath=$PAM_HOME/content/keys/samlKeystoreOneLoginSSO.jks - Define a path and name for the PAM auto-generated key. For example, $PAM_HOME/content/keys/samlKeystoreOneLoginSSO.jks (use forward slashes not backslashes)
-
cas.authn.pac4j.saml[0].identityProviderMetadataPath={Issuer URL From step 1.7} - Copy and paste the full URL from your Identity Provider Metadata used in step (4). For example, https://subDomain.OneLoginSSO.com/app/[externalKey]/sso/OneLoginSSO/metadata.
-
cas.authn.pac4j.saml[0].maximumAuthenticationLifetime=2073600: This value defines a 24 day period (value in seconds) in which a user has generated a last authentication event in Active Directory. This parameter helps if users begin experiencing login issues due to old authentication events.
Please note, if you made changes around SSO parameters to the $PAM_HOME/web/conf/catalina.properties file with the previously generated .xml and .jks files, you need to regenerate those files to apply the new changes.
-
-
When complete, save and close your catalina.properties file and restart PamManagement service.
- After the service fully restarts, it could take 3-5 minutes to fully restart, the keystore file should appear in samlKeystoreOneLoginSSO.jks keystore and oneloginsso.xml metadata files should appear in $PAM_HOME/content/keys.
Step 3: Complete the OneLogin Configuration
-
Return to your OneLogin portal.
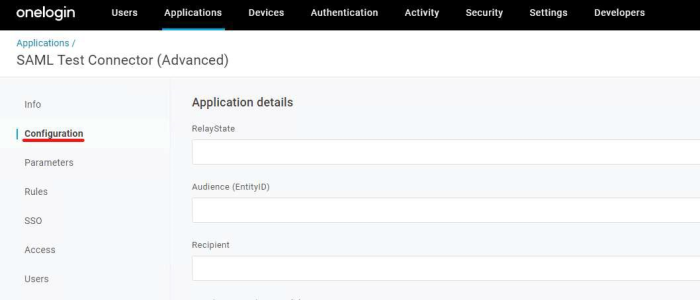
- In OneLogin application configuration go to Configuration page.
-
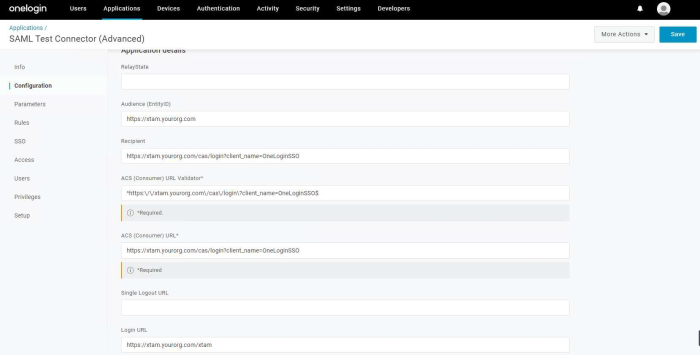
Enter values for all necessary fields that match those that were entered into the the catalina.properties file from the previous step:
Audience (EntityID): cas.authn.pac4j.saml[0].serviceProviderEntityId value from step 8
Recipient: https://pam.yourorg.com/cas/login?client_name=OneLoginSSO
ACS (Consumer) URL Validator: ^https:\/\/pam.yourorg.com\/cas\/login\?client_name=OneLoginSSO$
ACS (Consumer) URL: https://pam.yourorg.com/cas/login?client_name=OneLoginSSO
Login URL: https://pam.yourorg.com/xtam
SAML signature element: Assertion

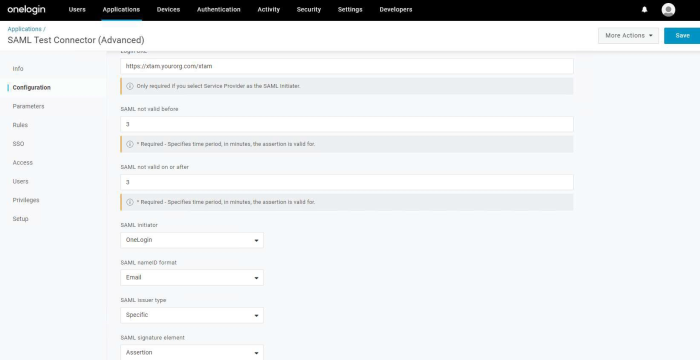
Click Save button.
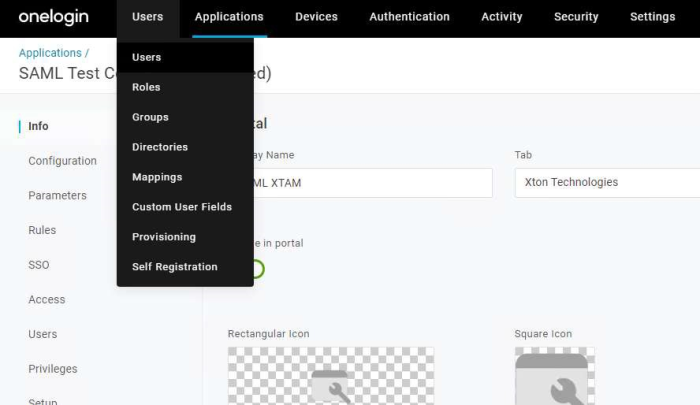
- Navigate to Users > Users.
-
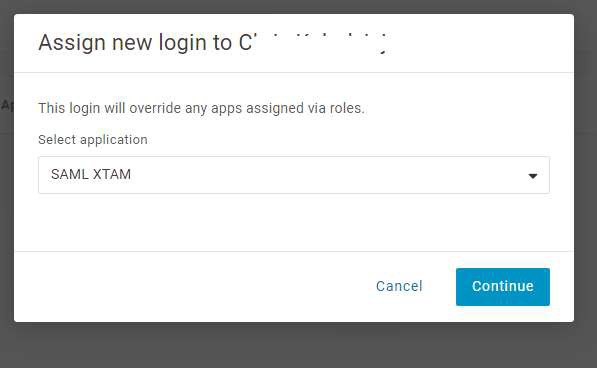
Select user that needs to login to the System using newly created application. Go to Applications and click + button.

- From dropdown menu select your application click Continue and click Save User.
-
Finally, you can open your PAM login page, click the button named OneLogin and test the login process with the User that was created in the previous step.
To regenerate .xml and .jks files
-
On the PAM host computer, open the following file in a text editor $PAM_HOME/web/conf/catalina.properties locate the section labeled # CAS and specify the stated location for those files.
-
Remove or delete these previously generated .xml and .jks files from the location.
-
Restart PamManagement (Windows) / pammanager (Linux/Unix) service to regenerate those two .xml and .jks files, so your changes around SSO parameters can apply back to PAM.