Integration with Shibboleth SSO
This guide describes how to configure integration between Imprivata PAM and Shibboleth Identity Provider to provide SAML authentication.
We currently support integration with V4 of the Shibboleth Identity Provider.
Requirements
Before you begin your integration, be sure you meet the following pre-requisites:
-
A working PAM deployment with the Federated Sign-In experience.
-
Access to your existing PAM host server. You will need to update files and restart services.
-
Access to your host running Shibboleth in order to configure your authentication services.
-
Shibboleth administrator to configure required settings (metadata files, AD integration) on Shibboleth.
Step 1: Generate Service Provider Metadata file for PAM
-
Login to the PAM host server and open the file $PAM_HOME/web/conf/catalina.properties in a text editor.
In this file, locate the section that begins with #CAS add the following new parameters:
-
In the lines referenced above, the {placeholders} should be updated to reflect your specific values as explained here.
Save and close the file when you are finished.
-
cas.authn.pac4j.saml[0].keystorePassword={password} - Create an alphanumeric password. Any value you want to enter.
-
cas.authn.pac4j.saml[0].privateKeyPassword={password} - Create an alphanumeric password. Any value you want to enter.
-
cas.authn.pac4j.saml[0].serviceProviderEntityId={managed_path} - Replace this placeholder URL with your full https PAM login page URL ending with /xtam/, for example https://pam.yourorg.com/xtam/.
-
cas.authn.pac4j.saml[0].serviceProviderMetadataPath={shibbolethsso.xml} - The full path and file name of the shibbolethsso.xml file that will be created after a PAM service restart later in this guide. For example, $PAM_HOME/content/keys/shibbolethsso.xml (use forward slashes not backslashes).
-
cas.authn.pac4j.saml[0].keystorePath={samlKeystoreshibbolethSSO.jks} - Define a path and name for the PAM auto-generated key that will be created after a PAM service restart later in this guide. For example, $PAM_HOME/content/keys/samlKeystoreshibbolethSSO.jks (use forward slashes not backslashes).
-
cas.authn.pac4j.saml[0].identityProviderMetadataPath={path} – This will be the full URL of the IDP Metadata URL from the Shibboleth Application temporarily saved to a file in the previous step 1.
-
cas.authn.pac4j.saml[0].maximumAuthenticationLifetime=2073600: This value defines a 24 day period (value in seconds) in which a user has generated a last authentication event in Active Directory. This parameter helps if users begin experiencing login issues due to old authentication events.
Please note, if you made changes around SSO parameters to the $PAM_HOME/web/conf/catalina.properties file with the previously generated .xml and .jks files, you need to regenerate those files to apply the new changes.
-
-
Restart the PAM service PamManagement (Windows) or pammanager (Linux).
-
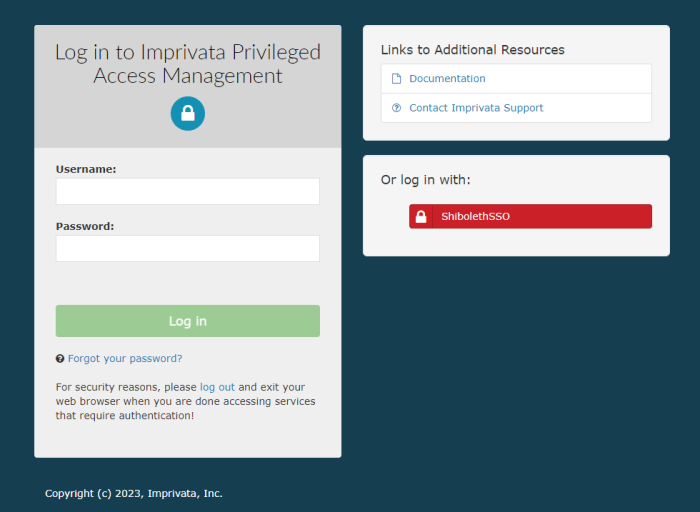
After the restart is complete, navigate to the PAM login page. Confirm that both files, samlKeystoreshibbolethSSO.jks and shibbolethsso.xml, were created in the location you defined.
#Shibboleth SSO
cas.authn.pac4j.saml[0].clientName=ShibbolethSSO
cas.authn.pac4j.saml[0].keystorePassword={password}
cas.authn.pac4j.saml[0].privateKeyPassword={password}
cas.authn.pac4j.saml[0].serviceProviderEntityId={managed_path}
cas.authn.pac4j.saml[0].serviceProviderMetadataPath={shibbolethsso.xml}
cas.authn.pac4j.saml[0].keystorePath={samlKeystoreshibbolethSSO.jks}
cas.authn.pac4j.saml[0].identityProviderMetadataPath={path}
cas.authn.pac4j.saml[0].maximumAuthenticationLifetime=2073600 Step 2. Configure your Shibboleth Identity Provider for Integration
Shibboleth supports multiple features which are detailed in https://shibboleth.atlassian.net/wiki/spaces/IDP4/pages/1265631633/ConfigurationFileSummary.
The main configuration is:
-
Configuring the Service Provider metadata (reference shibbolethsso.xml from previous step).
-
Setup relaying parties in the relaying-party.xml. Reference articlehttps://shibboleth.atlassian.net/wiki/spaces/IDP4/pages/1265631678/RelyingPartyConfiguration
-
Update the saml-nameid.xml with the source id’s in case of integration with Active Directory. Reference article for Name id config https://shibboleth.atlassian.net/wiki/spaces/IDP4/pages/1265631671/NameIDGenerationConfiguration
-
A sample entry in case Shibboleth is integrated with Active Directory. The p:attributeSourceIds would hold UserPrincipalName, uid or any property name that identifies a user
A sample entry for static relaying party configuration will look like:
<bean parent="RelyingPartyByName"
c:relyingPartyIds="https://pam.some.org:6443/xtam/">
<property name="profileConfigurations">
<list>
<bean parent="SAML2.SSO"
p:encryptAssertions="false"
p:nameIDFormatPrecedence="urn:oasis:names:tc:SAML:1.1:nameid-format:unspecified" />
</list>
</property>
</bean> Where c:relyingPartyIds is the PAM managed path url.
<bean parent="shibboleth.SAML2AttributeSourcedGenerator"
p:omitQualifiers="true"
p:format="urn:oasis:names:tc:SAML:1.1:nameid-format:unspecified"
p:attributeSourceIds="#{ {'userPrincipalName'} }" /> Testing the integration
When the service is fully restarted, open your browser, and navigate to the PAM login page.
Use the new Login using Shibboleth button located on the right side of the page.

To regenerate .xml and .jks files
-
On the PAM host computer, open the following file in a text editor $PAM_HOME/web/conf/catalina.properties locate the section labeled # CAS and specify the stated location for those files.
-
Remove or delete these previously generated .xml and .jks files from the location.
-
Restart PamManagement (Windows) / pammanager (Linux/Unix) service to regenerate those two .xml and .jks files, so your changes around SSO parameters can apply back to PAM.