Appendix
Remote Session Manager Configuration
When installing the Session Manager component on a remote Windows computer(s), then the following steps should be taken.
-
Ensure that PAM is Installed and configured on your master computer.
-
Run the setup file on the remote computer where Session Manager is to be deployed.
-
On the Welcome screen, click Next to begin the installation on this computer.
-
Read and accept the License Agreement by clicking the I Agree button to continue.
-
Uncheck all Component options except Session Manager. Click Next to continue.
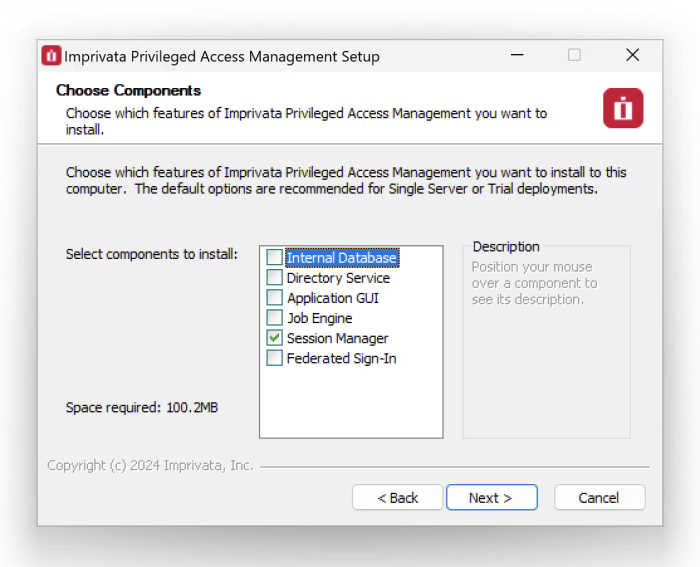
Select the Session Manager Component
-
Choose your installation location and click Next to continue.
-
When prompted, locate and select the certificate bundle that was deployed to your master computer where PAM was installed earlier. Click Next to continue.
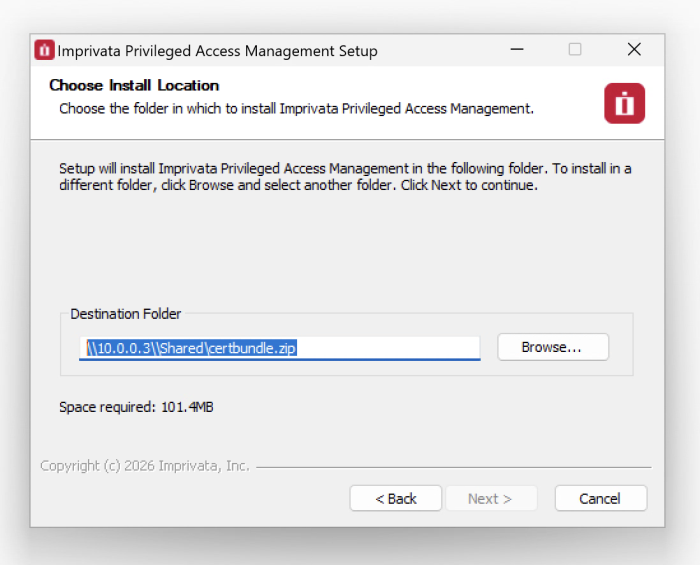
Locate and Select certbundle.zip
-
The certificate bundle is in the root PAM installation directory on your master computer. The default file location is C:\pam\certbundle.zip
-
You may select the zip file from this default location (if possible), copy it to a shared network location or simply copy the zip file to this remote computer and select it locally.
NOTE: This step is optional, so if you wish to not supply the certificate you may simply click Next to continue. By skipping this option, you are acknowledging that the communication between PAM on the master computer and this remote Session Manager computer will not be secured. Because of this, it is recommended that you supply the certificate when prompted and do not skip this step.
- The Session Manager service will now startup on this computer. Click Next to continue.
-
Click Finish to complete the installation.