Creating Custom Record Types
Privileged Access Management provides a variety of out of the box Record Types to assist in creating, organizing, connecting and establishing inheritance (parent/child relationship) within your records and secrets, but we understand that not every configuration of Access Manager is the same nor are its uses.
For this reason, the system supports the ability to create new custom record types so that Privileged Access Management can meet your specific requirements and scenarios.
The following article describes the process of creating your own Record Types.
- Login to the System using a System Administrator account. Only System Administrators can create new record types.
- Navigate to Administration > Record Types and click the button New Record Type.
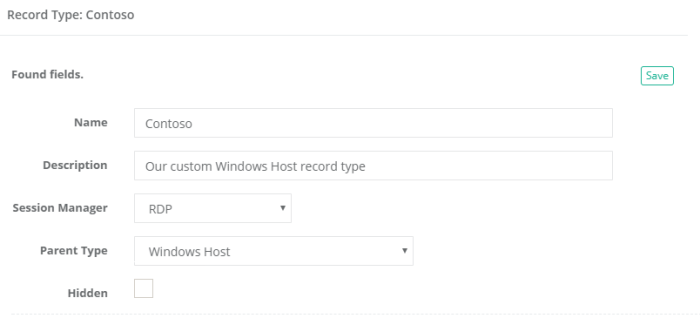
- Enter a Name for the new Record Type (required) and a Description (optional).
- If this Record Type will be used to create remote sessions, then select the protocol that will be used from the Session Manager dropdown. If it won’t be used for remote sessions, you may leave this selection empty or blank.
- If you want to inherit fields from an existing Record Type, then select that record type from the Parent Type dropdown. If you want to make this new record type unique (meaning it will not inherit any fields), then you may leave this selection empty or blank.
- If you would like to hide this (or any) Record Type from the Add Record dropdown menu, enable or check the Hidden box. Please note that hidden Record Types can still be used, this option will simply hide it on these dropdown menus.
- If you would like to hide this (or any) Record Type from the Add Record dropdown menu in Personal Vaults, disable or uncheck the Personal Vault box. Enable or check this box to show and allow this Record Type to be used in Personal Vaults.
-
Click the Save button when finished.
-
Once the new base Record Type is saved, you may now add custom Fields to it. Click the Add Field button to begin.
-
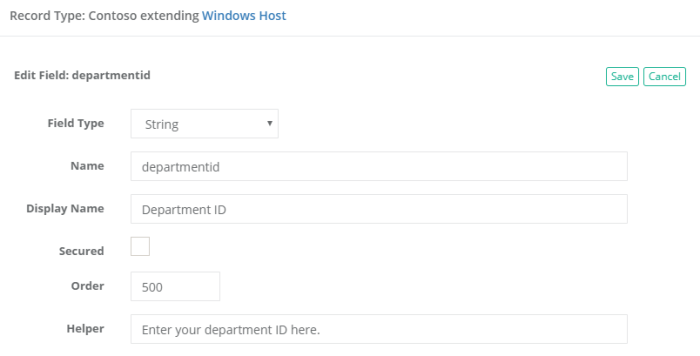
In the Field Type menu, select the type from the dropdown.
-
Enter a value in the Name field. This will be the field’s internal name.
-
Enter a value in the Display Name field. This will be the field’s name in the System interface and the one users will populate. Make sure it is something that will be recognizable and understood by your users.
-
If the field should be secured, meaning it will be concealed by default and have the Unlock option, check the Secured box.
-
Enter a numeric value into the Order parameter. This will determine the display order of the fields in the System interface.
-
Optionally, you may enter placeholder text into the Helper field that will be displayed in the System interface.

-
Click the Save button when finished.

For a description of each available field type, please review this page.
Your new record type and a new field have now been created.
You may continue to create additional custom fields for this type or you can navigate to the All Records section and begin testing it.
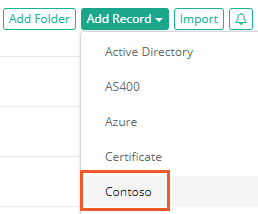
New Record Types will automatically appear in the Record Type dropdown menu and will be immediately available for use.
