Public Key Authentication for SSH Clients
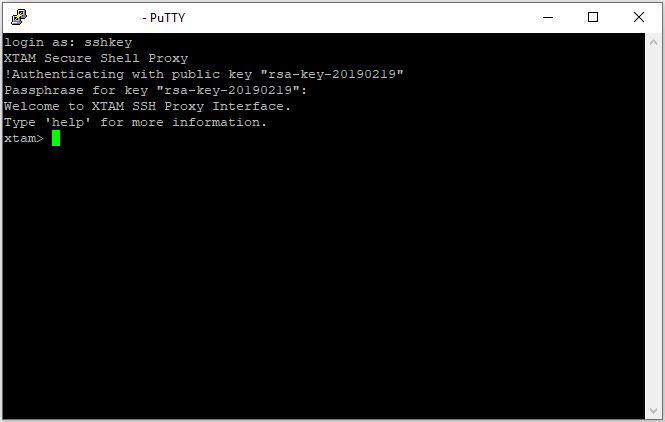
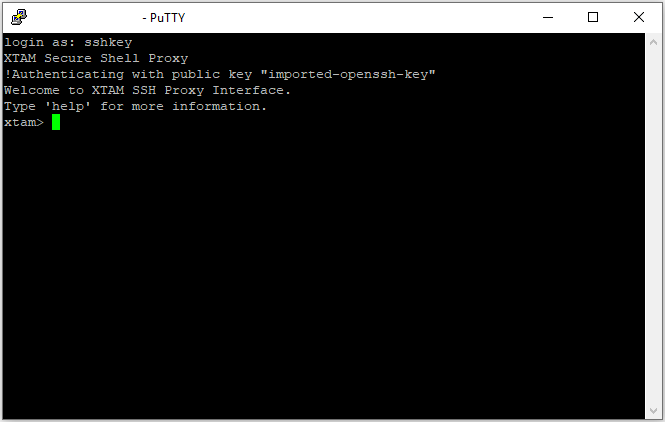
PAM’s SSH Proxy provides support for native SSH application such as SSH Shell, PuTTY, Secure CRT, MobaXTerm, ssh.com and others to establish high-trust connections to remote servers by using a personal account (managed by Microsoft AD, eDirectory or PAM itself) without knowledge of the actual (shared or privileged) account on the destination server.
PAM’s SSH Proxy allows a connection to remote servers using both user/password or private/public key authentication strategies as supported by remote server for this account.
Using the private key authentication mechanism when connecting to remote SSH servers:
- Simplifies access
- Promotes automation
- Reduces the number of passwords
- Increases overall network security
System supports the use of your existing Public/Private key pair or it can generate its own Public/Private key pair.
If you already have your own Public/Private key pair that you would like to use with PAM’s SSH Proxy, please read the To enable using your existing Public/Private Key Pair to enable.
If you would like PAM to generate you a new Public/Private key pair to use with the PAM SSH Proxy, please jump to the second section.
For PAM System Administrators managing these keys, please visit the section at the bottom of this page for available options.
To enable using your existing Public/Private Key Pair
Only RSA generated keys are currently supported.
- Login to your System user account and navigate to Management > My Profile > Preferences.
- For the Ssh2 Public Key parameter, click the Import button and select your Public Key file (*.pub) from your pair.
- Your public key will now be imported to your System user profile and can be used to authenticate with your private key from this pair.

To enable using generated Public/Private Key Pair
- Login to your System user account and navigate to Management > My Profile > Preferences.
- For the Ssh2 Public Key parameter, click the Generate () button.
- Choose the parameters for your public key generation and then click the Select button.
- Your public key will now be generated. This process may take several seconds to complete, so please do not refresh your browser during this time. Once the public key is generated, you will receive a Success dialog, click the OK button to continue.
- Your browser will automatically prompt you to download the Private Key (*.pem). Download and save your private key file to a safe location.
The private key is generated in .pem format.
You may need to convert this format to another in order to use it in your SSH application (PuTTY’s *.ppk format for example) or to assign a key comment or passphrase.

To disable using any Public/Private Key Pair
- Login to your System user account and navigate to Management > My Profile > Preferences.
- For the Ssh2 Public Key parameter, click the Delete button.
- Click the OK button on the Delete Public Key confirmation dialog
- Your Public Key is now removed from your System account SSH Proxy authentication.
Note for all users using keys, if your key has expired or been blocked by a System Administrator then you will no longer be able to use it to authenticate.
To confirm your key’s current status, navigate to your Preferences (Management > My Profile > Preferences)
- For blocked keys, the value in your SSH Public Key parameter will be crossed out (strike-through font)
- For expired keys, the value in your SSH Public Key Created parameter will be crossed out (strike-through font)
Please talk with your System Administrator for further information and assistance.
Note that PAM stores only public keys in the user’s profile of the PAM vault. The keys are not stored in the back end user directory (such as Active Directory).
System Administrator Key Management Options
To Expire Keys
- Login to your System with your System Administrator account and navigate to Administration > Settings > Parameters > SSH Proxy Public Key Expiration.
- Enter a value (in days) to expire these keys. Leave this parameter blank or empty to disable expiration.
- Click the Save button.
Blocking
To block a user’s ability to authenticate with their key:
- Login to your System with your System Administrator account and navigate to Reports > Users.
- Click the Columns dropdown menu and select the option labeled SSH Key. This column will display each user’s Public Key creation date. If they do not have a key associated to their account, it will be empty.
- Locate the User that you wish to block in this report, open the Action menu for their account and select the option Block SSH Key
- Click OK on the confirmation dialog prompt.
User blocked SSH Keys will be shown with their key creation date crossed out.
Unblocking
To unblock a user’s ability to authenticate with their key:
- Login to your System with your System Administrator account and navigate to Reports > Users.
- Click the Columns dropdown menu and select the option labeled SSH Key. This column will display each user’s Public Key creation date. If they do not have a key associated to their account, it will be empty.
- Locate the User that you wish to block in this report, open the Action menu for their account and select the option Unlock SSH Key
- Click OK on the confirmation dialog prompt.
The user’s SSH Key creation date will now be shown without the crossed out font.
Managing Local User SSH Keys
A System Administrator has the option to manage any Local User’s SSH key configuration and in the case of folder scoped Local Users, the Folder Owner(s) may also manage any Local User’s SSH key configuration within their folders.
To manage any Local User’s SSH Key configuration (System Administrators only):
-
Login to your System with your System Administrator account and navigate to Administration > Local Users.
-
Click the Edit button for the Local User that you wish to manage their SSH Key configuration.
-
Use the Generate, Upload or Delete options to perform the desired operation. If generating a new key pair, provide the private key to the user as needed.
To manage a folder scoped Local User’s SSH Key configuration (System Administrators or Folder Owners only):
-
Login to your System with your System Administrator or Folder Owner account and navigate to the folder where the Local User was created.
-
Open the Manage > Local User page from within this folder.
-
Click the Edit button for the Local User that you wish to manage their SSH Key configuration.
-
Use the Generate, Upload or Delete options to perform the desired operation. If generating a new key pair, provide the private key to the user as needed.
Additional Information
Additional System Administrator or Auditor Information:
- Audit Log events are created for the generation, uploading and deletion actions related to user’s SSH Public Keys.
- Audit Log events are created for the blocking and unblocking of a user’s key.
- The Users report SSH Key column (hidden by default) will display the creation date of the user’s key.
- The Users report SSH Key column (hidden by default) will display the creation date of the user’s key with four states:
Empty or blank: This user does not have a key associated to their account.
Normal font: This user has a key associated to their account that is not blocked and has not expired. Example: 06/15/2017 00:00:00
Strike-through font: This user has a key associated to their account and their key is blocked. Example:
06/15/2017 00:00:00Italic font: This user has a key associated to their account and their key has expired. Example: 06/15/2017 00:00:00.