Securing your Remote Session Manager Connection
Privileged Access Management’s architecture allows scaling to offload components to other servers for performance, geographical or network reasons.
One of these components is the Session Manager module.
By deploying this component on a different server it can allow sessions to be established to computers or systems that may not otherwise be accessible.
For additional information about why you may consider deploying multiple session managers, please read our blog post on this topic here: Deployment Architecture to Scale Session Manager.
While this allows for greater flexibility, it is important that the connection between the PAM web and these remote Session Manager components be secured to limit their exposure.
This security comes in the form of a certificate that ensures the communication cannot be intercepted.
During installation
Secure the connection to your Remote Session Manager during installation.
For Windows deployments:
If you are using a Windows Server 2008 or 2008r2 as the host for your remote session manager, please contact our Support Team https://support.imprivata.com/ for additional configuration requirements.
- Ensure that PAM is Installed and configured on your master computer
- Run the setup file on the remote computer where Session Manager is to be deployed.
- On the Welcome screen, click Next to begin the installation on this computer.
- Read and accept the License Agreement by clicking the I Agree button to continue.
- Uncheck all Component options except Session Manager. Click Next to continue.
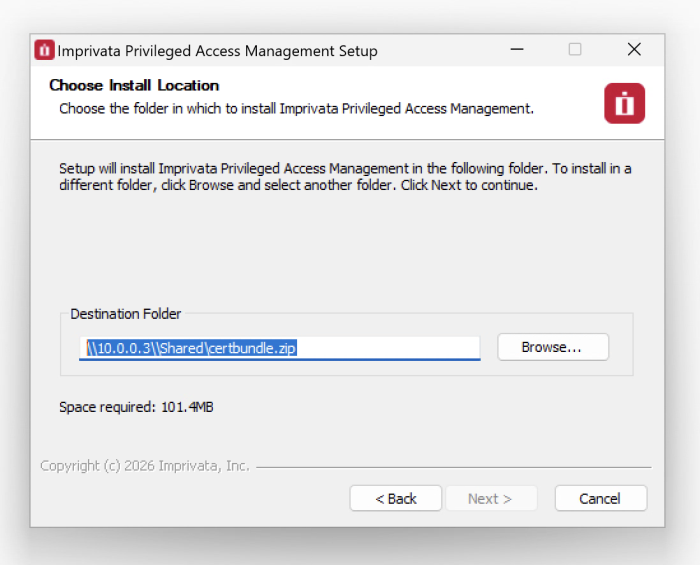
- Choose your installation location and click Next to continue.
- When prompted, locate and select the certificate bundle that was deployed to your master computer where PAM was installed earlier. Click Next to continue.
The certificate bundle is in the root PAM installation directory on your master computer. The default file location $PAM_HOME\certbundle.zip
You may select the zip file from this default location (if possible), copy it to a shared network location or simply copy the .zip file to this remote computer and select it locally.
-
The Session Manager service will now start up on this computer. Click Next to continue.
-
Click Finish to complete the installation.
Your remote connection to this Session Manager is now secured with PAM’s certificate. Now that your remote Session Manager is available, you will need to create a Proximity Group to begin using its functionality in PAM.
For Unix or Linux deployments:
- Ensure that PAM is Installed and configured on your master computer.
- Run the install script on the remote computer where Session Manager is to be deployed.
- Read and accept the License Agreement by pressing ‹ENTER› to display the agreement, ‹Q› when finished and finally ‹Y› to accept it and continue.
- Enter ‹N› to exclude each component except for the “Session Manager component” which you will include ‹Y› .
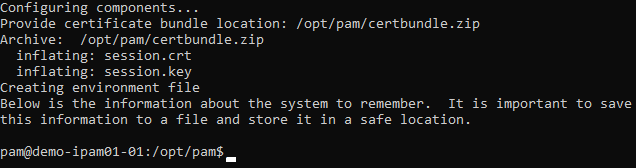
- Next, enter the location of the certificate bundle that was deployed to your master computer where PAM was installed earlier and press ‹ENTER› to continue.
The certificate bundle is in the root PAM installation directory on your master computer. The default file location is /certbundle.zip
You may select the .zip file from this default location (if possible), copy it to a shared network location or simply copy the zip file to this remote computer and select it locally.
-
The Session Manager service will now start up on this computer and the installation script will finalize the operation.
Your remote connection to this Session Manager is now secured with PAM’s certificate. Now that your remote Session Manager is available, you will need to create a Proximity Group to begin using its functionality in PAM.
Post installation
Secure the connection to your Remote Session Manager post installation.
While the process to secure this connection is possible post installation, it is a little more hands-on. If you need to perform this operation or questions remain or issues arise while using PAM, please contact the Support team: https://support.imprivata.com/.