Integration with Microsoft Azure AD Authenticator Push and OTP
The PAM server supports integration with Microsoft Azure AD Authenticator to provide second factor authentication through the use of the Microsoft Authenticator app (token and push).
Functionality
- MS Azure AD MFA for the access to the Imprivata PAM WEB GUI is implemented by SSO integration of login screen with Azure AD portal using SAML protocol.
- The following guide describes the configuration to enable Azure AD MFA for SSH, RDP Proxy connections made using native clients as well as for Workflow Requests requiring MFA configuration for requested actions.
Requirements
Before you begin your integration, be sure you meet the following pre-requisites:
- A working Imprivata PAM deployment with the Federated Sign-In experience.
- PAM system configured to use MFA for individual users or groups.
- If Users are created and managed in Azure AD, then a matching user must also exist in the back end AD or be created as a PAM Local User.
- If Users are synced from Active Directory to Azure AD, then you must also integrate PAM with the same Active Directory.
- Users must already enroll their device prior to authenticating with PAM. Device enrollment is not currently supported using PAM.
To enable Azure AD MFA for a specific user or group perform the following steps
- Optionally: For the deployments using sAMAccountName (user vs user@domain.com) user naming convention, define MS Azure AD domain in the global parameter Administration > Settings > Parameters > Drivers > Azure AD MFA Domain.
- Assign mfa-azure ad MFA provider to a user or a group that require to use it.
Configuring Azure
Register a New App
-
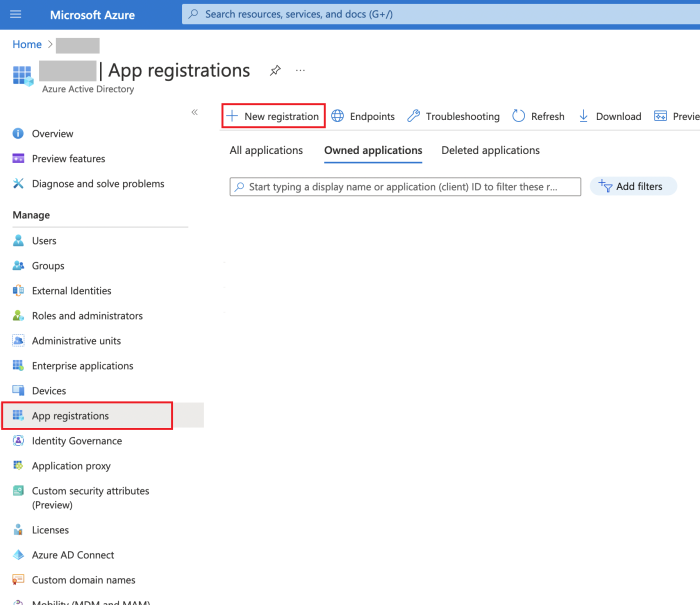
Login to your Azure Poral (https://portal.azure.com), navigate to Azure Active Directory and select App Registrations.
-
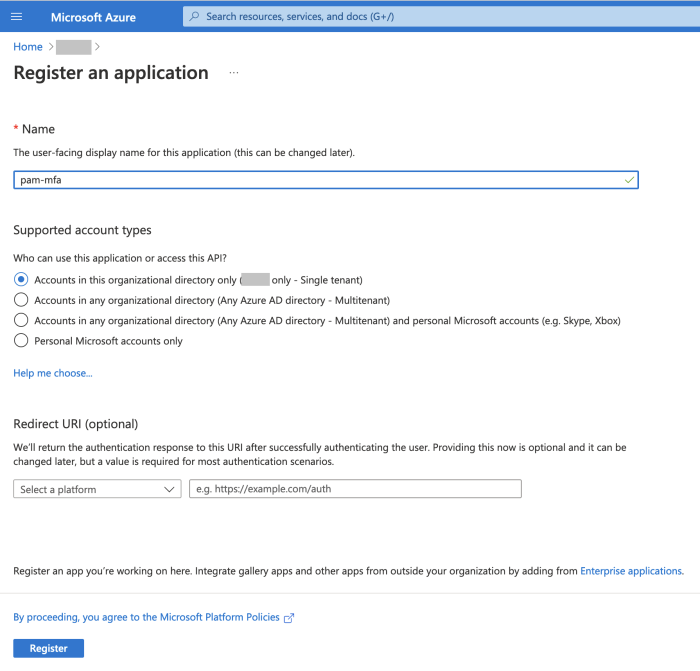
Select + New Registration and give it a meaningful name like “pam-mfa” or similar, press Register.
-
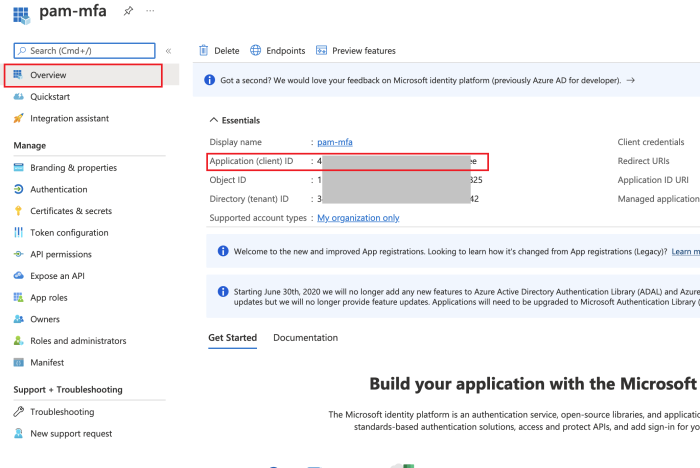
Retrieve the Application (client) ID from app registration overview page to use it in your PAM configuration.
Create an Access Policy
-
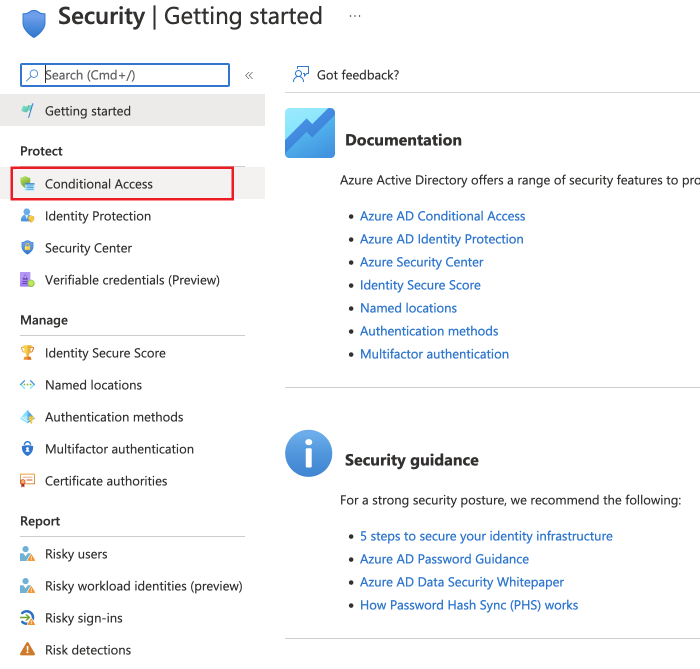
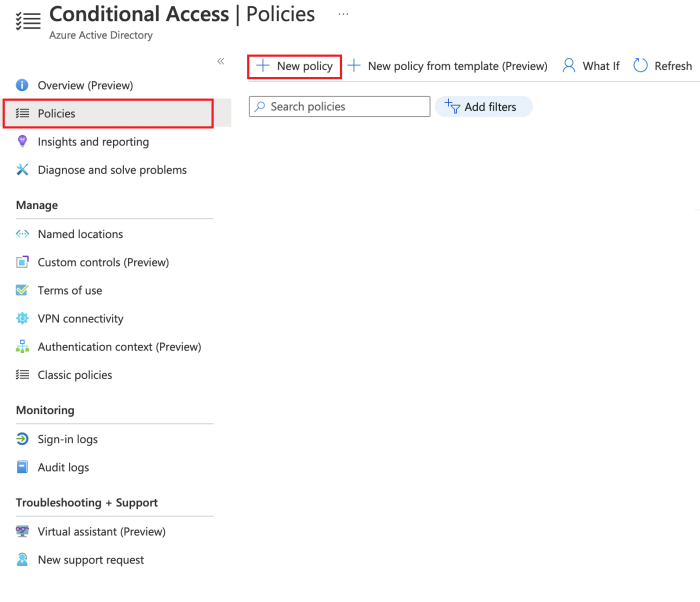
In your Azure Portal navigate to Azure Active Directory, then Security and finally Conditional Access.
-
Select + New policy to create your new policy.
-
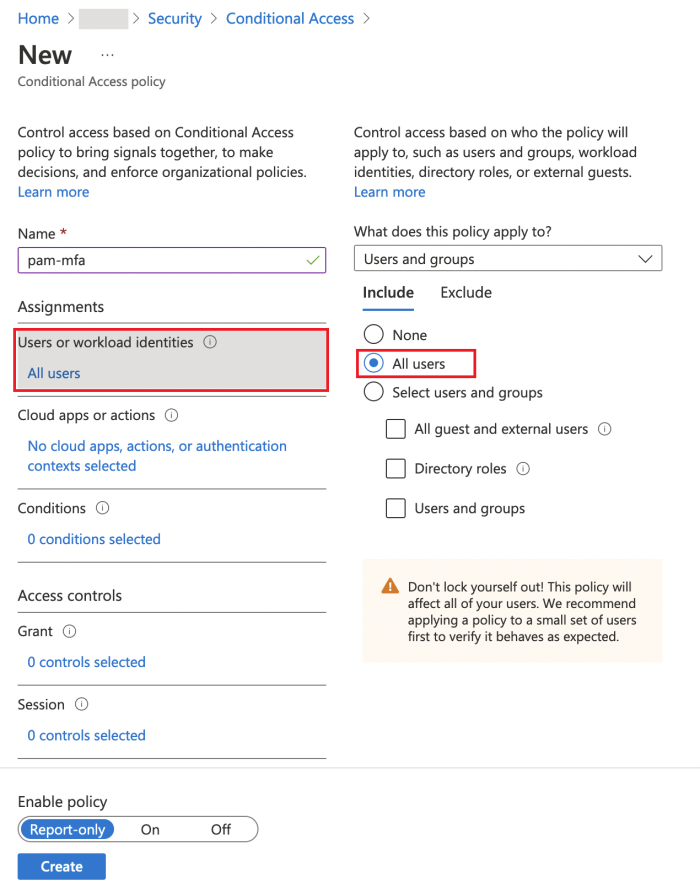
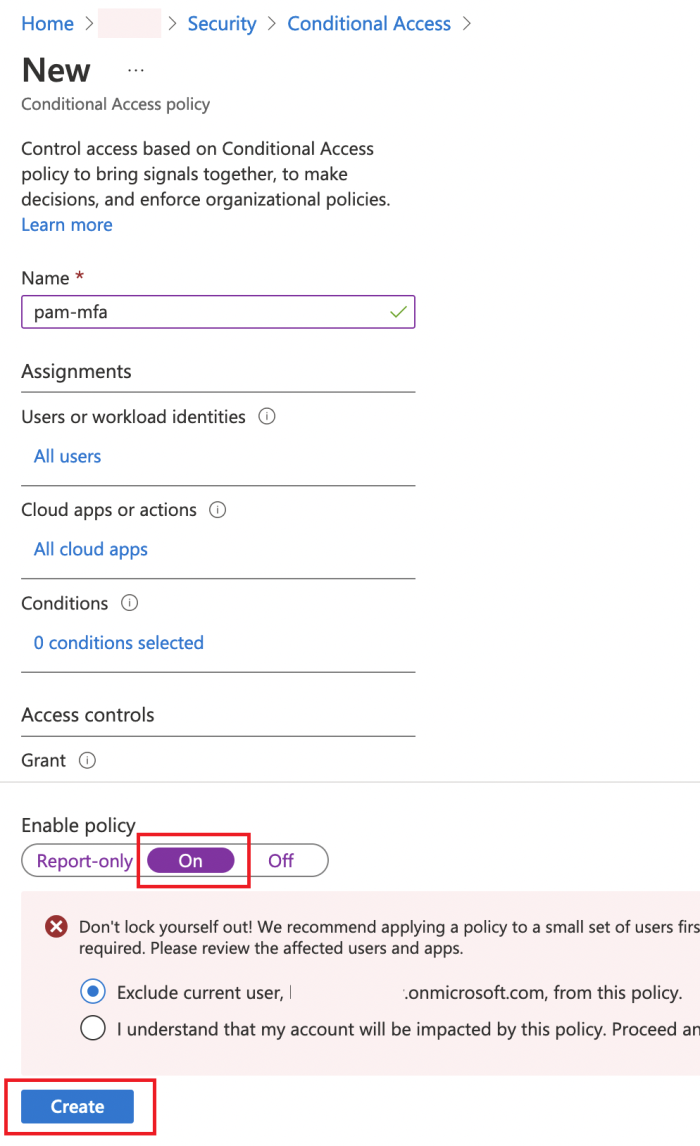
Give your new policy some meaningful name like “pam-mfa” or similar.
-
Select affected by policy users/groups in Users or workload identities, for example All users:
-
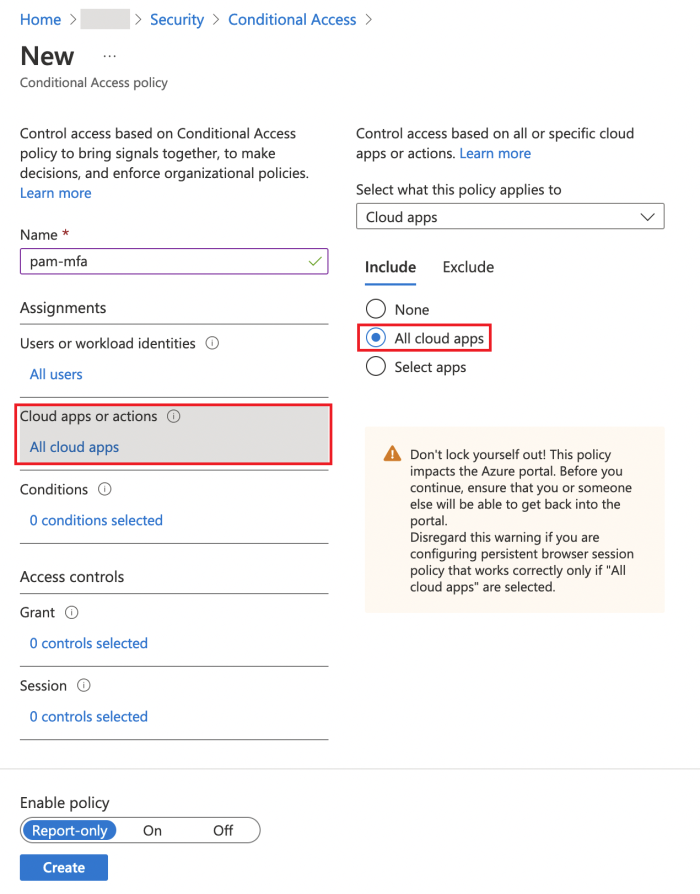
In the Cloud apps or actions select your newly created app registration:
-
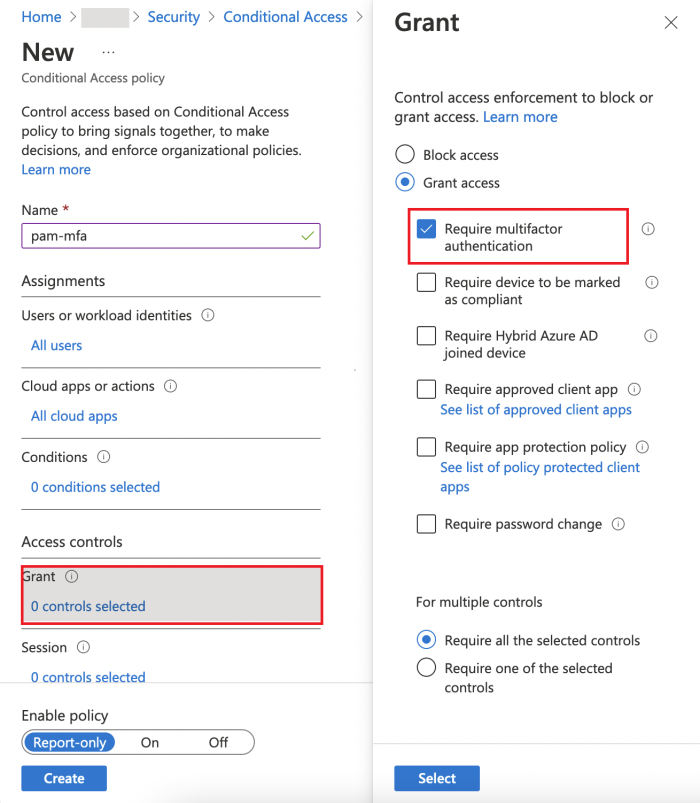
In the Grant section select Require multi-factor authentication
-
Ensure that Enable policy set to On and click Create. The result will be similar to this:

Configuring your PAM System Properties:
-
Open the file $PAM_HOME/web/conf/catalina.properties in a text editor and add this option to catalina.properties file and click Save:
-
If you also have Azure AD Guest users that will be required to authenticate with Azure MFA, then you must also add the following line that includes your Azure tenant ID. If you do not have Azure AD Guest users, then this parameter is not required:
xtam.mfa.azuread.tenanttid=<your Tenant ID>
-
Finally, restart your service PamManagement (Windows ) or pammanager (Linux) to complete your configuration.
xtam.mfa.azuread.clientid=<your App ID>
Azure MFA Number Matching
If MFA Number Matching is required in your Azure tenant, before their first use in PAM each user must manually enable Number Matching support. To enable, each user must login to PAM using their Azure AD SSO account, then navigate to Management > My Profile > Preferences and click the Re-enable button for the RDP Proxy Access parameter.
When prompted, the user must enter their valid password and click Enable. If the user’s password is changed any time after this value has been provided, they must repeat this process, or their Azure MFA authentication will be denied.
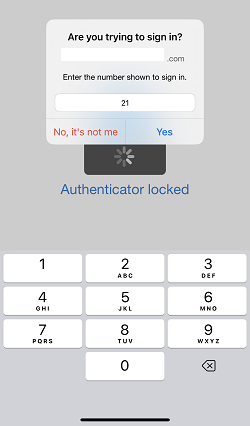
PAM native functionality supports Azure MFA Number Matching when:
-
MFA is required in a Workflow Binding
-
Authentication with the SSH Proxy.
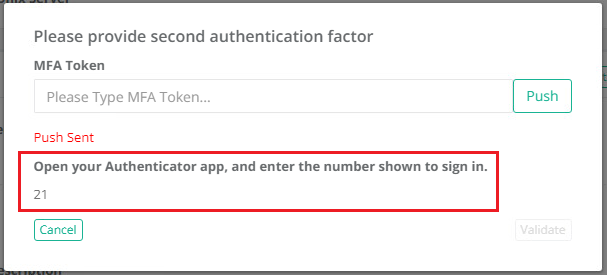
For MFA in a Workflow Binding, the approved user will be presented with the Number in PAM after the Push button is clicked, that is then required to be used in the Microsoft Authenticator App.
For SSH Proxy authentication, the user will be presented with the Number in the proxy that is then required to be used in the Microsoft Authenticator App.

Please note that these Numbers are time limited so if too much time has elapsed between when the number is generated and subsequently used in the Microsoft Authenticator App, MFA may be denied. The user must generate a new number if the current one has expired.
To test the integration
- Use user#push#record when logging in to SSH or RDP Proxy sessions.
- Use user#OTP#record when logging in to SSH or RDP Proxy sessions.
- Use user#record when logging in to SSH Proxy sessions and follow MFA prompt to use push or OTP 2nd factor authentication.
- Click the Push button or provide OTP on the MFA configuration dialogue triggered by the MFA enabled workflow requests.