Transferring Files
How to quickly copy files into or out of remote sessions using drag and drop.
When you are within an secure, remote session you can copy files into the remote host and copy files out of the remote host using a simple drag and drop method.
The following describes the procedure for both Windows and Unix host sessions.
For clipboard or file copy, please see this article.
To disable the ability to browse or transfer files during an in-browser session, click here for more information.
In a Windows Remote Sessions
To Copy Files in a Windows Remote Sessions:
- Connect to a Windows remote session.
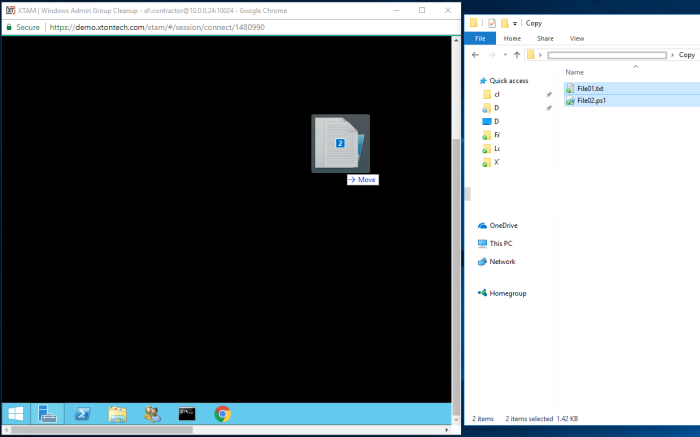
- From your local client, select the file(s) that you wish to copy to the remote host and drag those files into the browser tab or window where the remote session is running. Folder copy is not currently supported.
-
Drop the file(s) anywhere within the remote Windows host desktop.
-
The file(s) will immediately begin copying to the Windows host and upon completion they will be stored in the Privileged Access Management virtual drive G.
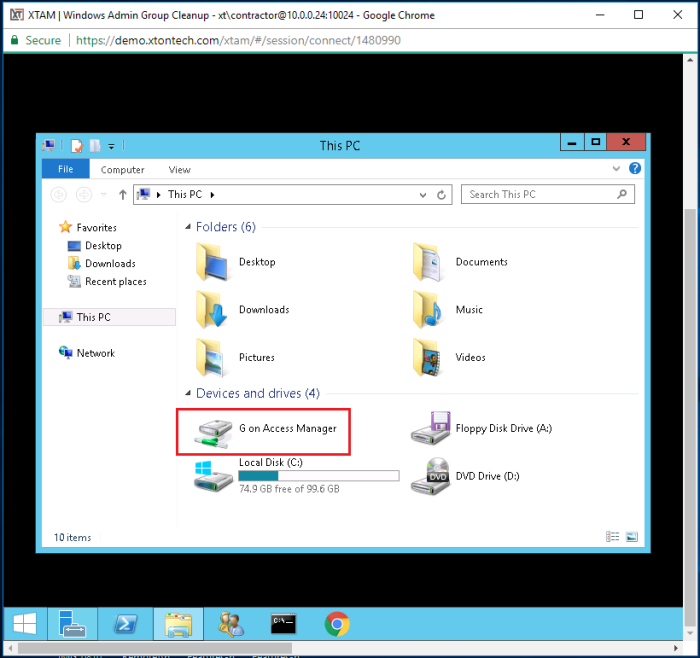
-
From this virtual G: drive, you can copy and paste the file(s) where needed on the remote host.
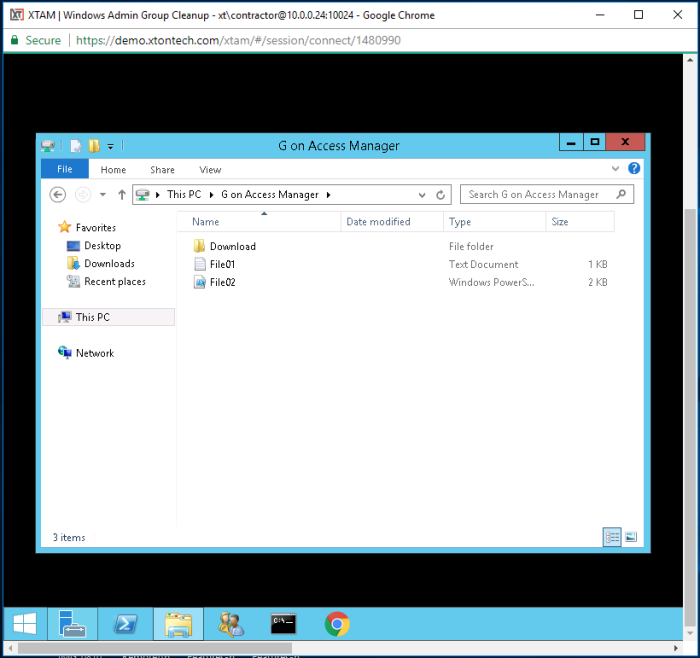
Out of Windows Remote host
-
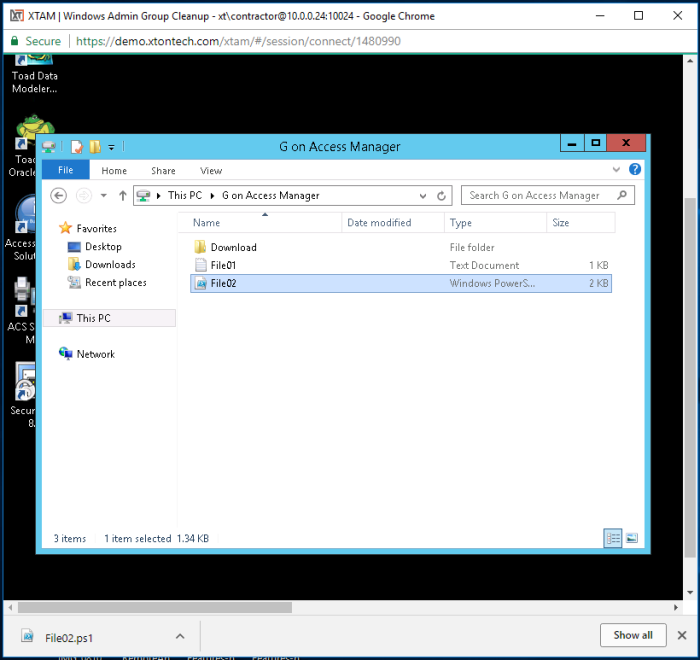
To copy files out of the Windows remote host, simply copy and paste the file (one at a time) from the remote host to the Download folder located in the Access Manager virtual drive G:.
-
Once the file has been copied to this Download folder, you will be prompted in your browser to download the file to your local computer.
-
Accept the browser download prompt and the file will immediately begin copying to your local client.
In a Unix Remote Sessions
To Copy Files in a Unix Remote Sessions:
- Connect to a Unix remote session.
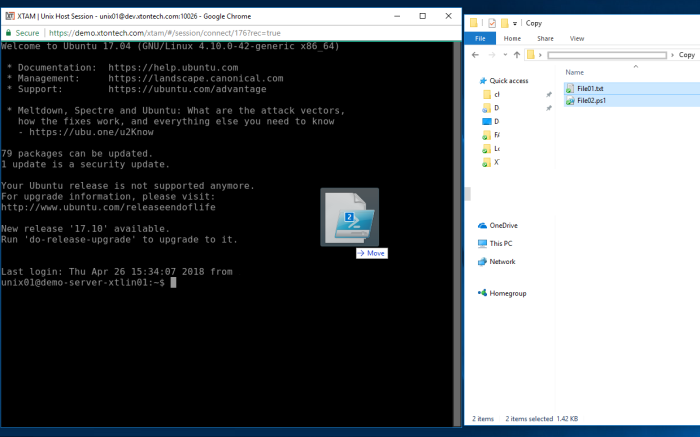
- From your local client, select the file(s) that you wish to copy to the remote host and drag those files into the browser tab or window where the remote session is running. Folder copy is not currently supported.
-
Drop the file(s) anywhere within the remote Unix host session.
-
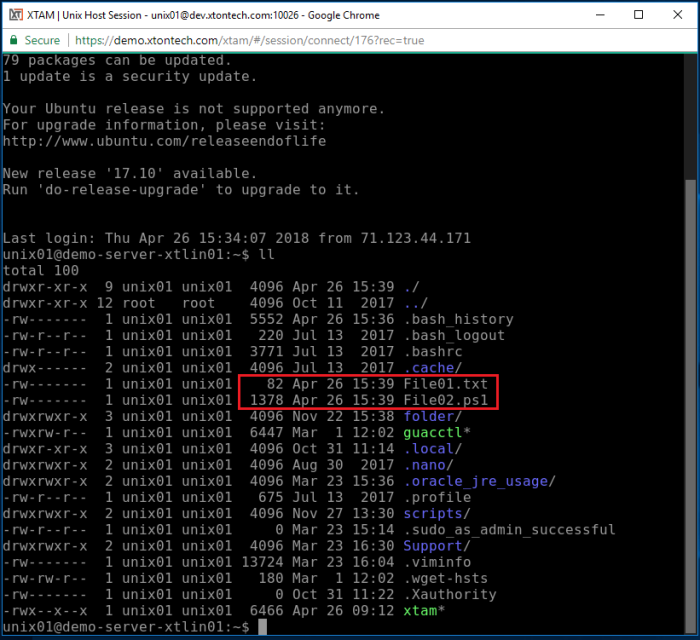
The file(s) will immediately begin copying to the Unix host and upon completion they will be stored in this user’s Unix Home directory.
-
From this Home directory, you can copy and paste the file(s) where needed on the remote host.
Out of the Unix remote host
-
To copy files out of the Unix remote host, select the Upload Tool option from the remote sessions Quick Menu located at the top of the session. This will deploy an PAM command utility to the user’s Unix Home directory.

-
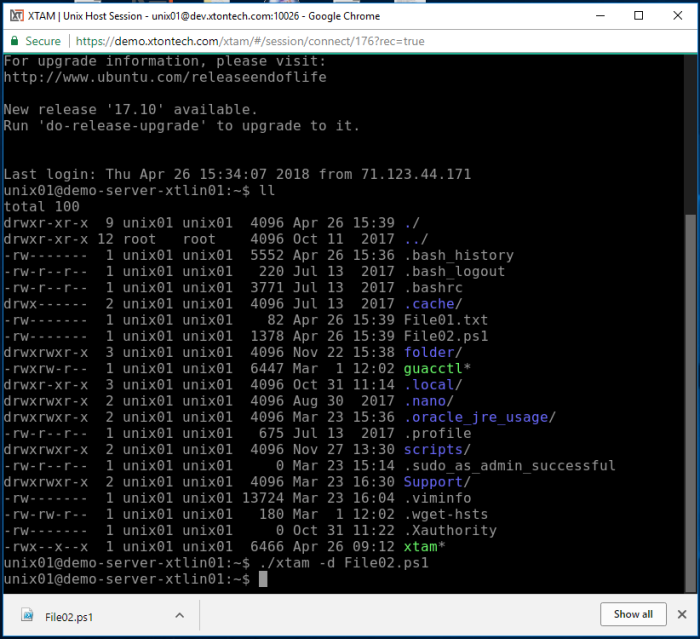
Once the PAM utility is deployed, you can execute the copy by issuing this command:
Copy./xtam -d filename # Name of the file to copy from the Unix host to your local client -
You will then be prompted by your browser to download the file. Accept the browser download prompt and the file(s) will immediately begin copying to your local client.
To maintain proper line formatting, ASCII Mode is supported in cases where files are transferred from remote Unix session hosts to Windows computers.
File Copy Session Events
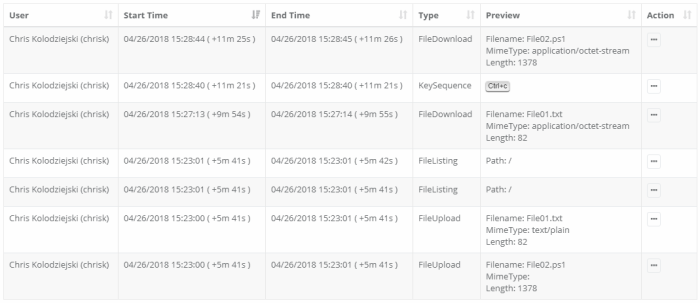
All files copied into or out of remote sessions will be captured via the Session Event log.
Using an account with the appropriate permissions, you can view these events using the following procedure.
- Navigate to the specific Record and click the Sessions tab. Note that Events can also be found in the Session Events report.
- Active the Action menu associated to the Sessions and select the Events option.
- Search, filter or sort by File Name of action (FileUpload indicates copying into and FileDownload indicates copying out of a session).
Disable Session
Disable Session File Browsing and Transfer.
If you want to disable the ability to browse or transfer files during in-browser remote sessions, then please configure the option described below.
- Login to PAM as a System Administrator.
- Navigate to Administration > Settings > Parameters > Session File Transfer.
- Select the Disabled option from the dropdown menu.
- Click the Save button next to this option.
Overwrite Session
Overwrite Session File Browsing and Transfer on an Individual Record.
You can overwrite the global Session File Transfer option described above, to allow or disallow file transfer on individual records. Please configure this overwrite mechanism as detailed next.
- Login to PAM as a System Administrator.
- Navigate to Administration > Record Types, locate the Record Type that is used for your Record where you want to overwrite the global configuration. Click this Record Type’s Edit button.
- Within this Record Type’s Edit page, click the Add Field button. Create a new custom field using the following parameters:
- Field Type: Choice
- Name: FileTransfer
- Display Name: File Transfer Control
- Values: Use Global,Enabled,Disabled
- Click Save to save your new field.
- Back on the Record Type Edit page, once again click Save to save the changes made to your Record Type.
- Now you can navigate to the Record itself that you want to enable this overwrite function, click the Record’s Edit button and select the appropriate choice. The choices are:
- Use Global (or no selection): This record will use the globally defined Session File Transfer configuration.
- Enabled: This record will allow/enable Session File Transfers regardless of the globally defined Session File Transfer configuration.
- Disabled: This record will not allow/disable Session File Transfers regardless of the globally defined Session File Transfer configuration.
- After you have made the selection, click the Save and Return button to save your record.
- Now you can test your record configuration by connecting to a new session.